Thursday, 11 December 2014

Esher College Vine - Production Diary


Production Diary

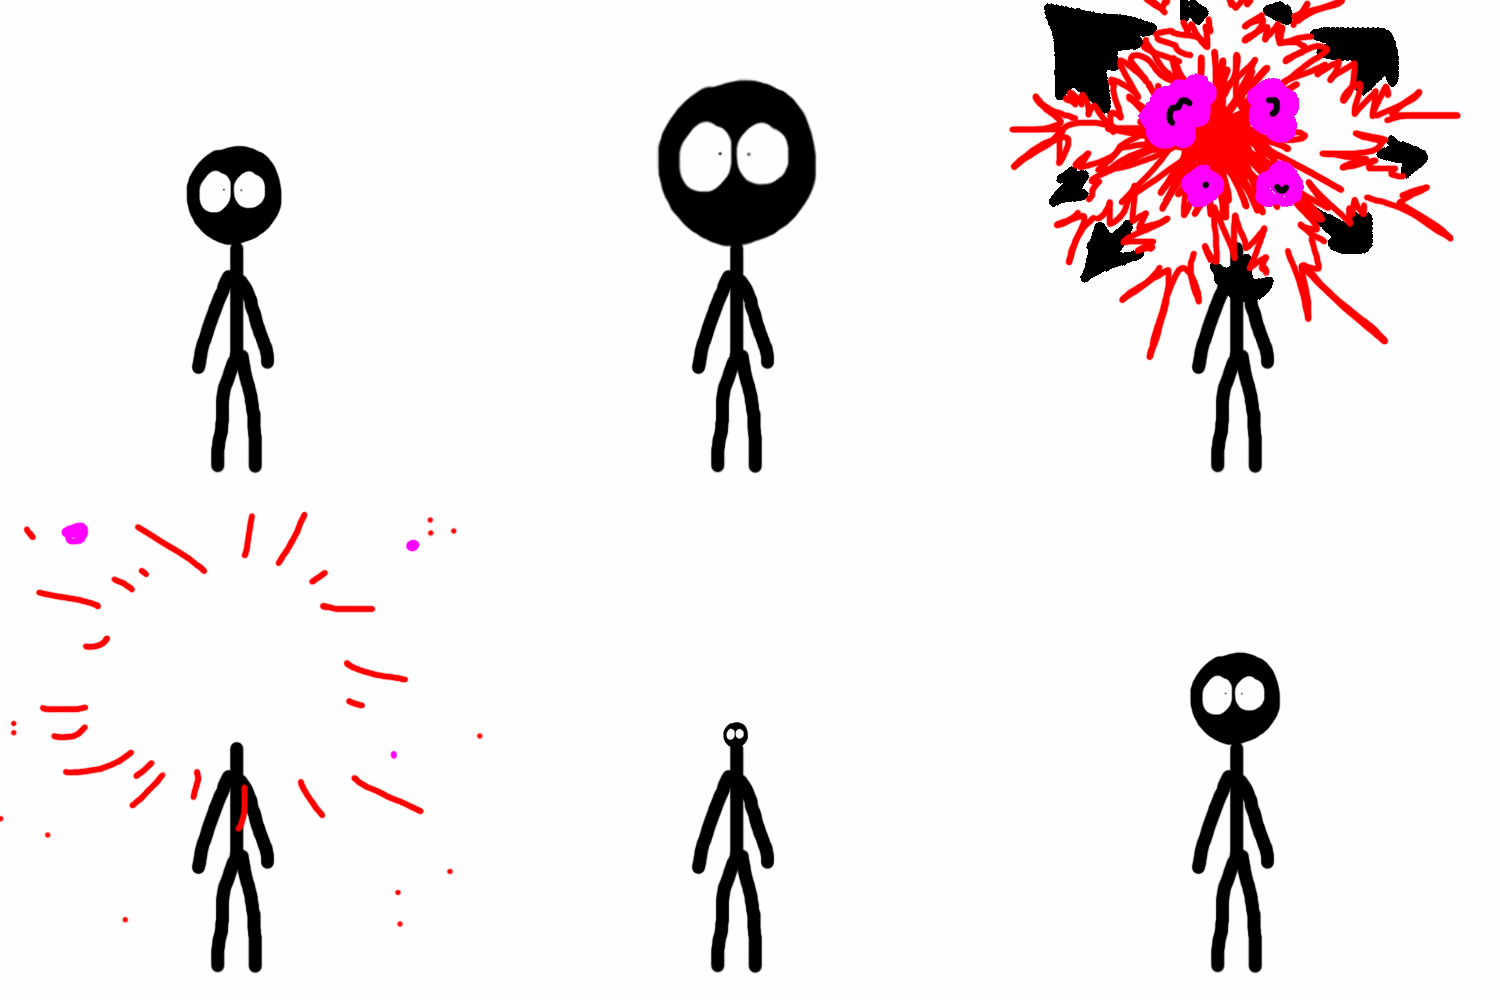
Esher College Student Rotoscope

·    Take previously created character drawing, and open it in Adobe Flash CC
·      Fill the character drawings with colour so they block colours
·      After, I took an image from Google and got a hand image, so I could complete my third shot. I rotoscoped the image so that it overlapped the character image so it looked like the characters were being held.
·      Then I inserted a background from the internet and used that as a basis for my background design – follows the main colours that represents Esher College
·      I drew two stars around the image and filled them in with colours.
·      After, I imported the Esher College logo and edited it in Photoshop to remove the white background. It was then placed into the image at the bottom of the image but within the star.
·      Finally, when this was completed, I exported the file as a video so that it could be edited into the final video in Adobe Premier Pro CC.

Vocal Cover

·      To create my vocal cover, I used the application Audacity
·      I downloaded a pre-made instrumental track of ‘Clean Bandit’s Rather Be’ from YouTube.
·      Then, I imported this instrumental into Audacity.
·      I selected the specific section of the instrumental that I wanted to use
·      After, I recorded over the instrumental with my voice, for the final section of this song which I selected
·      It was then exported as a final track as a ‘.wav’ and imported into Adobe Premier Pro later to be edited with my rotoscoping.

Canteen Rotoscope

·      I filmed the canteen with a panning shot – originally it was meant to be a 360 panning shot but I found it was difficult to film with people walking in between film and blocking the shot so it ended up being something similar to 180 panning shot.
·      Then, I edited my clip that I filmed using Final Cut Pro so I only kept the footage I needed which was cut from 14 seconds to 3 seconds.
·      I found I had to convert my footage from a ‘.mov’ to a ‘.flv’ file. To do this, I used the online application ‘Zamzar’ to convert it. It had to be converted so I could import it into Adobe Flash CC as it only accepted ‘.flv’ files.
·      After, I imported the converted file into Flash and began certain sections of my film.
·      I found that during the process, I had to redo my Rotoscope due to the incorrect sizing of my video. It didn’t seem to fit the whole scene when I tested the scene.
·      Also, I found I had problems with saving and technical difficulties, which made me, have to redo certain scenes again.
·      Finally, I exported the file as a video and imported it into Adobe Premier Pro CC to be edited together with the other files.

Garage Band – Sound effects and Music

·      Originally I was going to use Garage Band to combine my vocal cover with my sound effects to make it fill my 6-second vine.
·      However, I found that the scene was going to previously use wasn’t very relevant and made the flow of the videos very disjointed so this meant that I didn’t include the sound effect which I wasn’t going to originally use.
·      This also meant that I wouldn’t have to use Garage Band since created the vocal cover on audacity.

Punch Rotoscope

·      Primarily, I was going to use an animated punching scene with a sound effect to create comedy, however I found that it’s use was irrelevant and that it broke the flow of the vine.
·      My original plan was to include the punch scene as I found that people were most interested in comedy, however what I originally intended to do changed because of its unsuitability. 
·      So, I made the decision to remove the scene and extend my final scene so overall it was a 6-second vine.

Adobe Premier Pro – Final Edit

·      Although in my plan I didn’t plan on using this application, I remembered I needed to edit all my files together.
·      I imported my ‘Canteen Rotoscope,’ my ‘Esher College Student Rotoscope’ and my ‘Rather Be Vocal Cover’ into my new project.
·      After, I arranged my files so it started with my ‘Canteen Rotoscope’ then my ‘Esher College Student Rotoscope’ – however I extended the second scene so that it was a total of 6-second.
·      For my audio, I moved the audio so it ended at 6 seconds but as my audio was only about 4.5 seconds, I had no audio at the beginning.
·      For the ‘Canteen Rotoscope’ I used a ‘Wipe’ transition, then for the second scene, the ‘Esher Student College Rotoscope’ I ended it with a ‘Cross Dissolve’ transition.
·      Also, for my audio, I used an audio transition called ‘Constant Power’.
·      Finally, I watched my video the whole way through to check for any minor problems, and exported the file movie file.

Thursday, 23 October 2014

Garage Band


Garage Band Sampling

I created two samples using the program Garage Band. I used samples provided from Garage band itself to create my two samples. These samples are called Loops which include either MIDI files or audio files. MIDI files were in green whilst audio files were in blue. MIDI files allowed us to edit the sample to our liking unlike the audio files.

For my first music sample I used 4 audio files: 'Classic Rock Steel 04', 'Modern Rock Drums 11', 'Modern Rock Guitar 07' and 'Rock Bass 09'. The first audio, was a 16 beat audio whilst the other audios were 8 beat audios. I copied the audios with 8 beats so there were two of each so they all resulted in 16 beats. I adjusted some of the volume for some of audios to my preference. 

For my second music sample I used 4 audio files: 'Southern Rock Piano 01', 'Natural Drum Kit 02', 'Picked Steel String 10', 'Orchestra Strings 04'. The first audio was a 16 beat audio, whilst the 'Natural Drum Kit 02' and 'Picked Steel String 10' audios were 8 beats each. The final audio was 16 beats as well however I cut it so it was only 4 beats as I only wanted the first section in particular. Overall my whole piece was about 32 beats when I repeated sections. I also slightly altered the piano part by changing a few of the notes or deleting some of the notes as well. I ended the piece by adding a fade out.

Thursday, 2 October 2014

Cut Out Animation


Angel Cut Out Animation


To begin my animation, I first had my image taken of my full body so that when I imported it into Adobe Photoshop CC, I could cut out the outline of my body, and then disassemble each part so I could use it to move each part individually in Adobe Flash CC. However it was a much more difficult process as I had cut out each part individually and make a new file to be pasted into the new file. This was a long process as I had to make sure to remove the background after I had pasted it into the new file, before I saved it as a 'PNG' file otherwise when I imported into Adobe Flash CC the background would remain around the image. This was one of the faults I had which limited my time with my animation, as I had to go through every body part again and remove the background before saving it as a 'PNG'. I cut out the body and the individual body parts I used the polygonal lasso tool. A tip which I found useful was that it was best to cut out certain sections at a time when cutting out the full body as it reduced the chances of making a mistake and having to redo the whole cutting process again. 

After I finished cutting out the body parts, I imported the pictures from the library in Adobe Flash CC. These were then located on the sidebar to which I had to create 6 layers for each of the individual body parts but also another layer for the background. However I decided on creating a total of 8 layers as I had two backgrounds, one for the sky background and one for my originally drawn wings for my animation. Then, I named each layer after a certain body part as well as the background layers to avoid confusion when I was in the process of creating my animation. After, I placed each of the images into the correct layers according to the labels, making sure the bottom layers were the two background layers, the first background being the very bottom for the sky background, and the second background second from the bottom for the wings. I resized the body parts and assembled them so they looked like the original full body image in the centre of the screen. 

I proceeded to add a motion tween to both of my two selected body parts which were the left and right arm. But to add a motion tween both of these parts had to be converted into a symbol first. After they had become symbols I then extended the frames to where I wanted the motion tween to stop, and moved the body parts. Then I extended the other layers to the same amount of frames, so the parts are stationary whilst the specific parts move. After I created a blank keyframe and removed the motion tween, so then I could replace the arms with another image over the top. I used the onion skin tool to allow me to see what I had done in previous frames of my animation. The overall motion tween caused my arms to create an arc effect related to the 12 Principles of Animation. 

For my final finishes, I inserted the sky background by retrieving an image from Google, and saving it before importing it Adobe Flash CC. Then I dragged the image to the background layer and resized it to my preferences. Whilst for the second background layer I drew a wing on one side of my top body, and copied the image and pasted the image so I could move it to the other side. Then I flipped the drawn wing so that it was symmetrical to the other wing. 

Thursday, 25 September 2014

Rotoscoping Animation

Cart Wheeling Rotoscoping Animation


I began by animation by using a video where I could base my animation off. To do this, I had to go outside and film an extract of something so I could use it later. I decided on doing a simple cartwheel which I could then use to trace over for my animation. I did this with the help of one of my fellow classmates. Unfortunately, Adobe Flash CC doesn't allow '.mov' files so I had to convert the video to a '.flv' which stands for 'Flash Video'. To do this, I used an online application called Zamzar which allowed me to upload my video and send the converted file to my email. This could then be used on Adobe Flash CC to create my animation.

Then I imported the file into Adobe Flash CC and resized the video so it fit the page. After I added a new layer and renamed it so I wouldn't get confused between the video and the drawing. Then I dragged the new layer to the top so it overlapped the video, and then I locked the video at the bottom so I could avoid deleting the video by mistake. The frame rate for this animation was 24 frames per second - this meant that the animation would remain at a constant speed and follow the same speed as the original video, 24 frames per second is usually the custom frame rate used, and by increasing the frame rate meant that it would become slower, and likewise decreasing the frame rate would make it faster.

The main point of this exercise was the experiment what rotoscoping is. Rotoscoping is the process of taking a video and tracing certain aspects of it frame by frame. This can give it a realistic effect, and give a certain person for example more character and human-like features. It also allows you to experiment with the idea, as you can have a basic outline of the person but develop the drawing itself to create effects such as multiple eyes, or the use of colour to the make the human-like figure into an alien for example. Rotoscoping has been used for films such as the Lord of the Rings which bring a fictional character to life.

From frame to frame, I traced the basic outline of the shape, and wanted to create quite a fluid animation so I did every frame to avoid any jumpy effect by skipping out certain frames. I also added certain details such as slight shading on my hoodie, to missing out certain parts of my hair to differentiate the different shades you could see in my hair. Although it preferably would have been better with colour, I decided to stick only to black as it was much more basic, and by added details it was quite time-consuming so it was easier to stick to one colour. However adding colour would have probably given my animation much more life especially as realistically we live in a world full of colour. Also, I had to consider the different brush sizes for certain details. I used the '[' key to decrease the brush size, and the ']' key increase the brush size, it was simple shortcut which it it much quicker for me to modulate between brush sizes without wasting extra time trying to find the actual brush size tool to increase and decrease it. I found that, in certain frames I used a much bigger brush for the outline than other frames but it was hard to keep track with what size brush you used in the previous frame even with the onion skin effect to show you what you had done in the previous frame.

Personally, I think I achieved Persistence of Vision due to the fact the animation I created myself flowed very well and the outline of each frame was done to a good standard, apart from the slight rush at the end due to the lack of time which I found was a big aspect to how well the quality of the animation was. As I watched the animation replay itself, I didn't notice anything which was too noticeable other than the slight decrease of brush size from the beginning.

As for the affordances of animation, I didn't really use any of the affordances, as I decided to keep my animation quite realistic, if I was to develop my animation, I could have possibly used affordances to create it more sci-fi if I wanted to, but as it was a basic cart wheeling animation, it would have been quite strange to do so. But it does show how animation can be developed from a basic outline of the frame, I could also make my animation appear that towards the end by doing a cartwheel I could have caused something to explode, or possibly created a fight scene involving my cartwheel using rotoscoping and the affordances of animation to make the scene much more dynamic.

Thursday, 18 September 2014

Flip Book

Flipbooks are a good example of animations which focus on persistence of vision. As each page of the book is flipped, it slowly creates a smooth animation which to the eye seems as though it flows and isn't at all disjointed if done well.

The first idea I had for a flipbook, was based of characters evolving however that idea was scraped due to being too difficult as I had to retrace the characters and eventually make the characters move, and as I incorporated eyes from mangas it made the idea itself much more difficult.

However, my first attempt of an actual flipbook was based off a simple animation which involved a heart being shot through with an arrow, however I discovered that it wasn't as easy as I thought, and underestimated the amount of pages I had to draw the animation. I slowly made the arrow move through the page eventually going through the heart, however due to making the arrow move extremely slowly, the last couple of pages to which the arrow went through the heart were much more rushed and the animation itself became more ragged as the distance between the arrow's movements were much wider and caused the animation to become disjointed.

Then, I decided on creating a second attempt of a flipbook, attempting to learn from my mistakes with my previous attempt making sure I kept the movements flow fluidly and deciding on the best way to lay out my drawings so that they were simple yet creative. So I decided on a simple animation of a car moving, with the aid of YouTube to give myself a reference on how to make this animation as well as inspiration.

Considering the 12 principles of animation, the main principles focused in the flipbook would have to be solid drawings as well as straight ahead animation, as it's much more spontaneous than planned out and controlled because I didn't know how well my flipbook work until it was completed. Also the animation itself comes to life when you attempt to flip the flipbook.


Thaumatrope


The process of making the thaumatrope


I followed this template as a guide of making my thaumatrope.
I began by using a compass to create two circles of the size. Then I drew a line to create centre points for both of my circles. After I measured the distance between the two circles with a ruler and marked the halfway point between the two circles. Then, I measured a cm distance on both sides of the line and connected both sides to the circle. After, I measured the distance between the halfway point to one circle in which I then marked the middle of the two points with a dot and did the same process with the other circle. The distance was then measured the same for the other sides of the two circles to create a total of four tabs. After, I cut the outline out using scissors and folded the middle tab which is represented with a dotted line on the picture above, and folded the tab in half. I drew on both the circles, one circle with the jar upright, and another circle with a butterfly facing downwards. I did this because, if they butterfly was facing upwards when the thaumatrope was in action, the butterfly would be seen to be facing the wrong direction. Then I glued the thaumatrope together, and punched holes through the marked dots were on the tabs. Finally I slotted string through both the holes and made a knot at the end of both the strings, and this created a thaumatrope which spun, creating an image of a butterfly in a jar.

Persistence of Vision

The thaumatrope demonstrates persistence of vision as it creates an effect of the butterfly being contained in a jar in a smooth action. The action is smooth meaning that to the eye, it is unnoticed that both the images are separate from one another, but to the eye are seen as though they are together when spun.


Affordances of Animation

The affordances of animation relate to the matter of what animation can do that film cameras can not. For example: You can't make a person explode on film in comparison to in animation. For a process such as an exploding person, animation is a much more preferred method as its effect are more suitable in comparison to on film, which although let's say, we can film a rocket flying to the moon, it is much more expensive and more time-consuming than if we did the exact same process but using animation techniques to create this scene.


Shape Tween Animation


Ball Shape Tween Animation


The process of making this animation involved using Adobe Flash CC. However the process itself was different to the motion tween animation. For the shape tween, I didn't convert it into the symbol, but instead I created a ball shape and used the shape tween and the F6 key to move the ball from one place to the other, then I clicked on the frame after that and inserted a timeline key frame, and then removed the shape tween. I then clicked the shape of the ball so it became an oval, as though the ball itself was being squashed, so the shape changed at the bounce and not before.  Then I added a shape tween and clicked on the frame I wanted it to go to, and clicked on the F6 key, and moved ball to the place I wanted it to be, and changed the shape of the ball back to its original shape. I made a smaller object go faster to demonstrate the weight and surface area of the ball. To make it faster I made the smaller object use less frames in comparison to the larger object.

Motion Tween Animation


Car Motion Tween Animation


To produce my animation I used Adobe Flash CC. I created a vehicle using the help of Google, where I used a picture to outline and change the vehicle to make it my own. Then I deleted my picture which I got from Google so there was only an outline left. After I converted this image into a symbol and copied the image so I had two symbols both of which are in different layers. After I used the motion tweening effect to move my car from one location to another. Except one car used 24 frames, whilst the other used 48 frames, meaning it's speed was decreased by half. Also I created another layer which I dragged to the bottom for my background. This method is good for animations which involve something being faster than another e.g. a race or when you are trying to make one thing go in one direction and one going in another. However this is only useful for movement, as it follows a path of motion to get to another location this wouldn't be suitable for something which is much better stationary.

Wednesday, 17 September 2014

Contemporary Animators/Animations

Walt Disney

Walt Disney also known as Walter Elias, is known to be the 'father of animation'. He was one of the first people to corporate sound and animation, as well as advancing in colour animation. He was an American business magnate, cartoonist, film maker, philanthropist and voice actor. Walt Disney decided he wanted to draw because he wanted a place where families could go and enjoy themselves as well as be relieved of life stresses alongside his brother. One example of his works included the Alice Comedies which was what Alice in Wonderland was based on. 'Winner of 60 awards for his outstanding animation and live action plays.'

Fun fact: He had a fear of mice, yet it's what made him a millionaire.

https://www.youtube.com/watch?v=H58meqbp5Ps

Warner Bros.

The founders of Warner Bros were called Albert Warner, Harry Warner, Sam Warner and Jack Warner. Warner Bros. are an America producer of films. The technique they used in their animations is called cell animating which similarly refers to tracing over footage. They are well known for their animations such as the Powerpuff girls, Flintstones and Scooby Doo. Their aim was to make money as well as entertain children. They are considered as one of the most creative, flexible, innovative and diverse production companies.

https://www.youtube.com/watch?v=q-UHdA-4A6g

Hayao Miyazaki

Hayao Miyazaki is a Japanese film director, animator, manga artist, illustrator, producer and screen writer. At a young age he aspired to become a manga author. From reading illustrated stories in magazines, he acknowledged the influences of creative arts such as Tetsuji Fukushima and Osama Tezuka. However due to the influence of Tezuka, it led to him destroying his past work in thought that he was copying Tezuka's style which he thought to have hindered his own development as an artist. He is well known for collaborating for a long time with the film company, Studio Ghibli. Most of Miyazaki's work had reccurring themes such as humanity's relationship with nature, technology and feminism. This conveys his support for equality of gender roles. He has also influenced people such as the producers of Toy Story who see him as an inspiration. He is well-known for his use of hand animation techniques which result in him drawing extensive story boards.

https://www.youtube.com/watch?v=nhUWUPpPk_k

Trey Parker/Matt Stone

Trey Parker was an actor, animator, producer, screen writer and director. He met his creative partner and best friend Matt Stone whilst studying at the university of Colorado. They worked together to create South Park. From watching Monty Python, he became inspired by Terry Gilliam who was one of the members of the Monty Python group. The production of South Park used traditional cut paper stop motion which was similar to what was used in the Simpsons which used computer stop motion. The purpose was to show adults and children that this is a life that is made up and that some people can learn from their 'real-life' experiences.

https://www.youtube.com/watch?v=9pSh0VAVYn4

Monty Python

Monty Python is a British surreal comedy group, which was a comedy sketch that aired on the BBC on the 5th October 1969. Their influence on British comedy has been apparent for years whilst in North America is has coloured the works cult performers. 3 key people to the Monty Python group include: Eric Idle, Graham Chapman and Terry Gillman (although their are 6 members of the Monty Python). Graham Clapham was an English comedian, writer and actor. Eric Idle was a comedian, actor, author, singer, writer and comedic composer. Whilst Terry Gillman was an American-born, British screen writer, film director and animator.

https://www.youtube.com/watch?v=QYgqdaI-NRg

Yellow Submarine (1968)

The animator of the Yellow Submarine was George Dunning. He made many personal short films noted for their surrealistic atmosphere and Kafkaesque themes. Yellow Submarine was created to gain more popularity for the Beatles. This animation is known to have influenced many creators of animations such as the Simpsons, Futurama, South Park and Toy Story. If it wasn't for the Yellow Submarine some of these animations would have never existed due to the lack of past inspiration. It's innovative animation influenced the audience to become more interested in animation and even consider a career in animation. This animation was seen as the true start of modern animation. It's surreal and over the top style would be nearly impossible to achieve in a completely live action piece, to which is uses the affordances of animation to a great extent. This animation also focuses on some of the 12 principles of animation, such as exaggeration, appeal and secondary action.

https://www.youtube.com/watch?v=laRyswIO_-g

A Scanner Darkly

A Scanner Darkly was an animated science-fiction thriller film which used rotoshop which was a method of tracing over film, frame by frame. It is an intensive form of animation which was based on the book by Phillip K. Dick. The film focuses on themes of drugs, nudity and considerably quite dark. The film itself is rather engrossing as it conveys a story of identity and deception. The use of animation was considered as there was very little animation which was targeted at an adult audience.

https://www.youtube.com/watch?v=0VZy4G67QRw

Gorillaz

The Gorillaz are an English virtual band form in 1998. The creators of the band are Damon Albarn and Jamie Hewlett. The band are also made up of 4 animated characters which are 100% fictional, all of which are featured in their music videos. Jamie Hewlett as well as being the co-creator of the band is also a English comic book writer. The band itself are in the Guinness World Records for the 'Most Successful Animated Band'. The Gorillaz use an animation technique called "Cell Shading" which involves creating a 3D model and shading different parts of the object. They also use a high frame rate meaning their videos are very smooth and clear as well as the characters being lip synced. The Gorillaz were the first ever band to produce an animated music video and have influenced various other bands such as the Artic Monkeys. As for the 12 principles of animations, they use one key principle which is timing. Timing is important as the sound has to run parallel to the animation on screen.

https://www.youtube.com/watch?v=pls_luhVdAw

Tuesday, 16 September 2014

Flash Animation


Walking Flash Animation


To create this animation, I used the application called 'Adobe Flash CS6'. The process was involved in making this included using a frame by frame process which meant that each frame was redrawn but with the help of the onion skin tool so you could see what you had drawn before on your next frame. To repeat the previous frame we used the key 'F6' to copy the previous frame, and then we deleted the drawing from the previous frame to create a blank frame. I drew my stick person with them moving their limbs little by little to create the effect of my stickman walking. I also reduced the frames per second from 24 frames per second to 18 frames per second to reduce the speed of my animation. Also, I used layers to create a background for my animation, but I dragged the second layer below the previous layer so that the background would be seen under the stickman rather than overlapping the animation.

Wednesday, 10 September 2014

12 Principles of Animation

The basic 12 principles of animation were developed by the 'old men' of Walt Disney Studios, otherwise known as Frank Thomas and Ollie Johnston, during the 1930's. 

1. Squash and Stretch - This action gives an illusion of weight and volume to a character when it moves. It can also be useful towards animating speech as well as facial expressions.

2. Anticipation - This movement allows the audience to get ready for a major action the character is about to perform e.g. when they begin to run, jump or change expression. 

3. Staging - A pose or action should clearly convey to the audience the attitude, mood, reaction or idea of a character as this relates to the story and continuity of the story line. However effectively using the correct shots e.g. long, medium or close up shots as well as the use of camera angles can aid telling the story.

4. Straight ahead and pose to pose animation - A straight ahead animation starts at the first drawing and works drawing to drawing to the end of the scene. Although this can lead to the lost of size, volume and proportions with the method, it can be considered spontaneous as well as rather fresh. Usually straight ahead animations would be used to create fast, wild action scenes. Whilst pose to pose is more planned out and outlined with key drawings done at intervals throughout the scene. By doing this, it means that the size, volumes and proportions can be controlled better as well as the action. 

5. Follow through and overlapping action - A follow through is when the main body of the character stops, all other parts continue to catch up to the main mass of the character e.g. arms, long hair etc. However nothing stops all at once. Whilst an overlapping action is when the character changes direction whilst their clothes or hair continues forward. 

6. Slow-out and slow-in - These are often used to soften the action, making it more life like. For a gag action, you may omit some slow-out or slow-ins for shock appeal or the element of surprise. This will result in giving the scene more snap. 

7. Arcs - All actions with a few exceptions (such as the animation of a mechanical device) will follow an arc or slightly circular path. Arcs given animation a more natural action and better flow.

8. Secondary action - The is an action which can be an additional effect to enrich the main action as well as adding more dimension to the character animation, supplementing and/or re-enforcing the main action.

9. Timing - To become an expert with timing, the best way to do so is through experience and personal experimentation, The basics involve using more drawings between poses to slow and smooth the action whilst fewer drawings make the action faster and crisper. Also timing is important in the acting of a character to establish mood, emotion and reaction to another character or situation.

10. Exaggeration - It is not considered an extreme distortion of drawing or extremely broad, violent action all the time. Its like a caricature of facial features, expression, poses, attitudes and actions. Using exaggeration in a walk or an eye movement or even a head turn can add appeal to a film.

11. Solid drawing - Animation focuses on the basic principles of drawing which are form, weight, volume solidity and the illusion of 3-D. The way you draw cartoons and then transform them into colour and movement can give the characters the illusion of 3-D and 4-D life.

12. Appeal - This will be used to capture and involve the audience's interest as it includes an easy to read design, clear drawing and personality development. 


Reference:
http://minyos.its.rmit.edu.au/aim/a_notes/anim_principles.html

Persistence of Vision

What is Persistence of Vision?

Persistence of Vision is a theory which states that the human eye always maintains images for a fraction of a second, so it refers to the fact what we are currently seeing at the moment is a mixture between with what was going on a fraction of a second ago. It is an illusion of motion which causes us not to notice any fractional skips between the images we see due the persistence which is sustained before us to make the motion seem smooth.


References:

Pioneers and Developers of Animation

Throughout the years there have been many pioneers and developers who have affected the history of animation. Here are some examples of famous pioneers and developers who are considered influential:

Joseph Plateau


Joseph was a Belgian physicist who attended the university of Liege. After university he became a doctor of physical and mathematical scientist. He is well known for the phenakistoscope as introduced by himself and his sons in 1832. The phenakistoscope uses two discs: the first disc has slots around edges, whilst the second disc has drawings of actions around the disc in circles. The way it works is the discs spin together in the same direction unlike Faraday's wheel which spun in the opposite direction. The phenakistoscope is viewed in a mirror leading to the images on the second disc appearing as though they are moving. However a disadvantage of the phenakistoscope is that it can only be viewed by one person at a time. Also it can't be spun too fast as this can cause a blur. If the discs are spun backwards it means the correct moving image wouldn't be seen. Overall this is considered as a very basic animation, and was only popular for 2 years.


His first major contribution was due to the work of his doctorate on perceptions of colour by the human eye. He discovered that by observing a periodically moving object through a hole in a rotating disk, it was possible to make the object appear as though it was stationary by rotating the disk at a suitable speed. This is the principle which underlies all viewing of moving pictures. He also published work about how an eye retains an impression of a coloured object in the complementary colour.


References:

William Horner

William was an animation pioneer who was known best for creating the zoetrope in 1834. The zoetrope is a device that produces an illusion of actions from a rapid succession. This creation is considered an improvement on the phenakistoscope. From the zoetrope led to the creation of the praxinoscope, and animation began being viewed simpler. The zoetrope contains small slits on the side where a person could look inside, this gave a better effect than phenakistoscope. Designs varied from animals to football players and is still currently in use today.


Reference:

Emile Reynaud

Emile was a photographer, teacher as well as an artist. He was the inventor of the praxinoscope as well as the creator of the first animated cartoons. He is considered as one of the pioneers of cinema. He held an apprenticeship where he worked to repair, assemble and develop optical and physics instruments. He also went to Artige & Co where he learnt about industrial drawing. As he continued to develop the praxinoscope into the praxinscope-theatre (with a decor) he also then developed the projection-praxinoscope (projection on a screen). However it was limited to 12 frames. The praxinoscope theatre had a mirror-drum and cylinder set in a wooden box, where there was a glass-covered viewing aperture reflecting a card printed with a background. The moving subjects were printed on a black band thus appeared superimposed on a suitable scene. Whilst the projection praxinoscope used a series of transparent pictures on glass with a oil lamp for illuminated images and mirror reflections passed through a lens onto the screen. The same lamp projected static background where moving pictures were seen in an appropriate setting.


References:

Edward Muybridge

Edward was known as the father of motion picture. His early photographic experiments laid foundations for modern cinema due to his study. He established a reputation for landscape work where later he was appointed the director of photographic surveys for the US government. Later in life, he began to consider rapid motion photography where he was approached by a racehorse owner, Leland Stanford, due to his wager on an issue to whether a galloping horse was ever airborne. He used wet plats to produce faint, highly underexposed plates proving Stanford''s point in which that all 4 hooves left the ground a the same time. He later returned to his attempts of high-speed photography. He then expanded his experiments on horse movement which led him to set up a series of 50 cameras parallel to a race track, connecting electrically controlled shutters to trip wires lain across the track which ensured each one automatically took their own picture as the horse sped by leading to "The Horse in Motion" in 1882. He also invented the zoopraxiscope. He found a way of projecting his silhouettes in rapid succession on screen as well as developing a new multi-lens camera which produced a celebrated high-speed study into movement of both animals and humans. His contributions to art and photography spurred the works of many inventors as well as his innovative camera techniques which enabled people to see things otherwise too fast to comprehend. In modern day, his sequence images continue to inspire artists.


References:

Thomas Edison

Thomas is well known for his many inventions such as the electric lightbulb, the phonograph, alkaline storage batteries, the kinetograph (a camera for motion pictures) as well as many other inventions. He made his first invention in New York city which was an improved stock ticker better known as the universal stock printer which job was to synchronise several stock tickers' transactions. He is was an independent entrepreneur who formed numerous partnerships and developed products for the highest bidder. He also founded the Edison Illuminating company which was the first investor-owned electric utility which later became the General Electric Corporation. However he transitioned into the occupation of a industrialist as well as a business manager although was not as successful. He invented the kinetoscope which was a machine for watching movies, although the first movies only allowed one person to watch at the time, or better known as "peep shows". The development of the projecting kinetoscope meant audiences of several people could enjoy silent movies. He also set up a studio which was covered in black tar paper with a roof which opened to the sun to let in daylight. This was due electric lights of the time not being strong enough for motion photography. The studio was set on a turntable so the entire building could be rotated to follow the sun.


References:

Lumière Brothers

The Lumière brothers were French inventors and pioneer manufacturers of photographic equipment. They devised an early-motion picture camera and projector known as the Cinématographe. They also created he first motion picture known as the La Sortie des ouvriers de l’usine Lumière". Louis Lumière worked on the problem of commercially satisfactory development of film. At the age of 18, he succeeded so well that with his father's financial aid, he opened a factory for producing photographic plates, which led to immediate success. By 1894 they were producing approximately 15 million plates a year. Louis Lumière also found a solution to the problem of combining animation with projection. The Lumière apparatus consisted of a single camera used for photography and projecting, with 16 frames per second. Their first films recorded everyday French life, but there were also early comedy shorts, as well as presenting the first newsreel and the first documentaries. Antoine Lumière after noting financial rewards of new photographic processes took on the course of setting up a business which manufactured and supplied photographic equipment. The Cinématographe was much smaller than Edison's Kinetograph  as well as lightweight (approximately 5 kilograms) and hand cranked. By being able to have 16 frames per second, it meant that it was much slower than Edison's 48 frames per second which led to less film being used and also the clatter and grinding associated with Edison's device was reduced. The Lumière brothers also opened up theatres to show their films, so within the first 4 months of 1896 they had opened theatres in London, Brussels, Belgium and New York. By 1907, they produced the first practical colour photography process called the Autochrome plate.


References: